

Are you looking for ways to transform your home?
Well, you can buy new pieces of furniture to change the entire look. However, you can also paint the furniture to renovate the space at a cheaper cost. Painting furniture allows you make older furniture look brand new or rejuvenate vintage furniture at the most affordable rate. When painting metal or wooden furniture for outdoor or indoor use, there are varying requirements but the tools and supplies are similar. Here is what you need to know.
Wood Furniture
1. Prepare The Surface And The Painting Space
To avoid inhaling the paint fumes, you should paint the furniture in a properly ventilated space. If you can’t the furniture outside, you should open a window in the house. Also, you should set up a fan to circulate fresh air. Make sure the room is completely dusted and vacuum wherever necessary to avoid the dust from settling on the wet paint. Next, place the furniture on a tarp or drop cloth. Finally, you should clean the furniture using mineral spirits.
2. Remove The Hardware
Does the furniture have removal metal hardware such as hinges or handles? You should detach them to avoid the paint from sticking on them. If you remove shelves and drawers can be removed, you should do it and paint them separately to the main body of the furniture. Use painter’s tape to cover the areas that you want to be paint-free.
3. Sand The Surface
Before you start repainting your wooden furniture, you should remove the paint and finish already in place. Next, sand down the furniture to prepare it for the new coat. Sanding should be done manually with your hand or a hand-held sanding machine especially the large items such as dressers, tables and bookshelves to avoid damaging it.
For the flat surfaces, you should use a hand-held sanding block. When sanding curves, you should use sandpaper attached to a foam backing. It has some flexibility for the best results. Sanding allows the new paint to adhere to the furniture surface by completely removing the old paint. It also provides a smooth and even finish.
You should start with 220-grit sanding sandpaper or sponge then increase the grit to achieve a smoother finish. When painting larger furniture, it might be easier to use an orbital sander. When you are done, you should wipe the furniture completely to remove the dust using a lint-free cloth. Consider using wood putty to fill in the holes and scratches. Don’t forget to wear safety glasses or a dust mask to avoid any injuries.
4. Apply Primer
Before painting the wooden furniture, you should add a layer of primer as the base coat. It will allow better adhesion and overall durability. When applying the primer, you should apply a thin layer and in the direction of the grain. Choose a primer color that matches the paint. Once you are done priming, you should sand the surface lightly using a 220-grit sanding sponge.
Here is a good article explaining more about why you should use primer before you start painting:
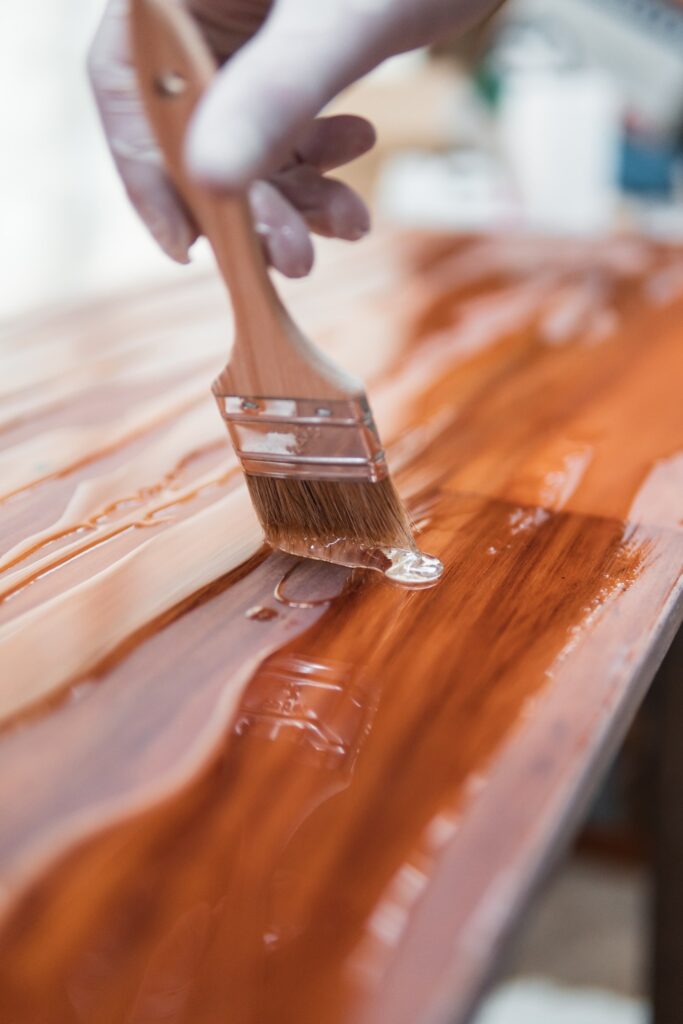
5. Apply The Paint
Brushes are more effective than spray paint when repainting wooden furniture. Choose a brush that is narrower than the part of the furniture you are painting. If you are painting large, flat areas, rollers are the best choice, especially table tops. When painting indoor furniture, latex paint is a great choice.
It’s always better to use high quality ingredients and this is true with paint also. The best paint that you can use when refurbishing furniture is Fusion Mineral Paint. By using high quality paint, you actually end up spending less money and time. The reason is because the paint is thicker and you don’t have to use as much. This is why if you spend a little more up front, you save a lot over time.
Before painting, you should apply a small amount first so you can see how it looks on the wood. Brush in the direction of the wood grain then allow the paint to dry depending on the manufacturer’s instructions. Apply 2 coats of paint for the best results.
6. Add A Protective Topcoat
When repainting wood furniture, a topcoat will protect the surface from scratches and any other types of wear and tear. Satin polyurethane will make the finish more durable. However, you should look for non-yellowing varieties. If you have white furniture pieces, you should consider furniture wax. Use a brush to apply one or two coats. Let it dry out for at least a day.
Metal Furniture
1. Clean The Surface
Use a household detergent to clean the surface of the metal furniture. Use a sanding brush or wire brush to remove the peeling paint and rust from the surface. It comes in handy for the outdoor metal furniture, especially for the patio furniture. Use a damp cloth to wipe off any residue on the surface. It’s a good idea to paint the furniture outdoors for proper ventilation. If there is anything at risk of getting paint, you should use a drop cloth to cover it. You should disassemble the furniture to make sure the paint is applied evenly.
2. Apply The Spray Paint
Spray paint leaves a smoother appearance and brush marks are more visible. Even better, you don’t necessarily have to use a primer. Choose the right paint for outdoor furniture with consideration of weather elements. If there will be frequent rain, you should buy paint with rust inhibitor. Follow the instructions and shake the spray can before you start painting. Hold the spray can about 8 inches then spray a light coat. Use multiple light coats to generate a better appearance than 1 or 2 heavy coats. You should be prepared to switch out the nozzle as required.
3. Proper Drying
Allow the furniture to dry properly in a well-ventilated space for about 24 hours. Make sure it’s sheltered from unexpected rain.
With these useful tips, you should be able to add some shine to your furniture effortlessly.